
How to Fix a Leaking Pipe Without Replacing It
Many pipe leaks can be stopped quickly and affordably without touching the existing pipe at all. Knowing which method to use for your specific situation makes the difference between a fast fix and an expensive mistake.
What Kind of Pipe Leak Can Be Fixed Without Replacement?
Not every leak qualifies for a DIY repair, and being honest about that from the start saves you time and protects your home.
Temporary and semi-permanent repairs work well on small pinholes caused by corrosion, minor cracks along a straight pipe section, slow-seeping joint connections, and leaks on pipes that are fully visible and accessible, while more serious damage may require pipe replacement instead of a simple fix.
Burst pipes, heavily corroded sections that crumble when touched, and leaks located inside walls, under floors, or beneath a concrete slab always need a licensed plumber. Attempting a DIY fix on those situations makes the damage worse and the repair more expensive.
For everything else, these five methods deliver reliable results.
Before You Start Any Repair
Turn Off the Water Supply First
Locating the nearest shut-off valve and turning it off completely is the first action to take before touching the pipe. If no local valve exists near the leak, shut off the main water supply to the house.
Open a faucet nearby to release remaining water pressure in the line. Letting the pressure drop before working on the pipe prevents water from pushing against your repair while it sets.
Dry the Pipe Surface Completely
Every repair method in this guide requires a clean, dry surface to bond or seal properly. Wipe the pipe down firmly with a dry rag and give it several minutes to air dry.
Using a hair dryer on a low heat setting speeds up the drying process on a stubborn damp pipe. A properly dried surface is the single most important preparation step for a successful repair.
Place a bucket under the leak to catch any residual dripping while you get everything ready.
5 Methods to Fix a Leaking Pipe Without Replacing It
Method 1: Pipe Repair Clamp
Reaching for a pipe repair clamp is the right move for pinholes and small cracks on straight pipe sections. This is one of the most widely used and reliable pipe leak repair solutions available to homeowners.
A repair clamp wraps around the outside of the pipe and uses a rubber gasket and metal bolts to press a watertight seal directly over the damaged spot. Slide the clamp into position so the rubber gasket sits centered over the leak, then tighten the bolts evenly on both sides until snug.
Pick up a clamp at any hardware store for $10 to $25. Match the clamp diameter precisely to your pipe size for a proper seal. Most clamps work on copper, galvanized steel, and PVC pipe.
Turning the water back on slowly after installation lets you confirm the seal is holding before fully restoring pressure.
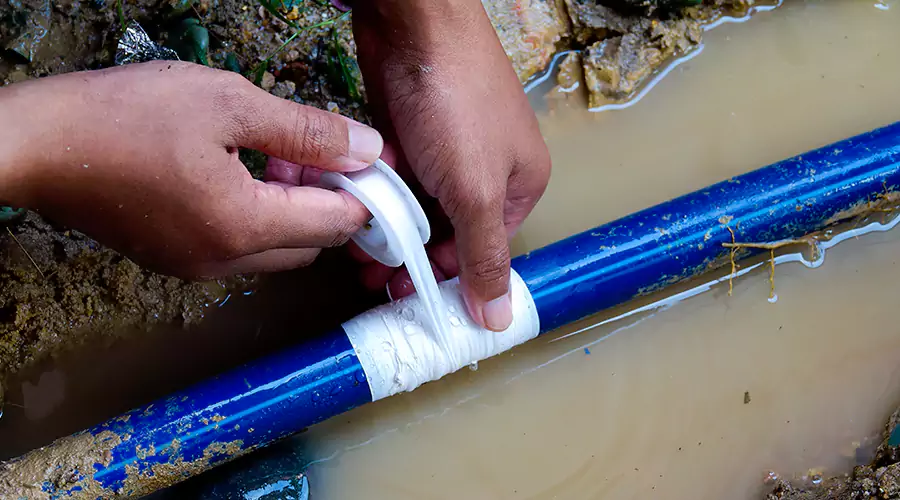
Method 2: Epoxy Pipe Repair Putty
Fixing a pinhole, small crack, or seeping joint with epoxy putty costs as little as $8 and takes about 10 minutes from start to finish.
Two-part epoxy putty comes in a stick with an inner and outer layer. Cutting off a section and kneading it together activates the chemical reaction that gives it its bonding strength. Work the putty until the color becomes uniform throughout, then press it firmly over the leak and smooth it around the pipe surface.
Epoxy putty bonds to copper, PVC, galvanized pipe, and most other common pipe materials. Some formulas work on damp surfaces, but checking the product label before applying confirms compatibility with your situation.
Allow the putty to cure fully before restoring water flow. Most products require a minimum of one hour, and waiting the full recommended cure time gives the strongest possible result.
Method 3: Pipe Repair Tape
Wrapping a leaking pipe with silicone repair tape is one of the fastest fixes a homeowner can make. No adhesive is involved silicone tape bonds to itself when stretched and wrapped tightly, creating a flexible watertight layer over the damaged area.
Start wrapping two inches before the leak and continue two inches past it. Overlap each pass by about half the tape width and pull it firmly as you wrap. The tension is what activates the self-bonding property of silicone tape.
Fiberglass repair tape provides a harder and more permanent finish. It uses a water-activated resin that sets into a rigid cast around the pipe, making it significantly stronger than silicone tape for longer-term repairs.
Both options are available at hardware stores for $5 to $15 and work on most pipe materials and sizes.
Method 4: Rubber Pipe Connector or Compression Coupling
Repairing a leaking joint or fitting connection calls for a different approach than wrapping or clamping a mid-pipe crack.
A rubber pipe connector slides over the joint area and is secured with stainless steel clamps tightened on each end. It creates a flexible, watertight sleeve over the connection without requiring any soldering, gluing, or special tools.
A compression coupling works by cutting out a short section of pipe around the damaged area and inserting the coupling between the two clean pipe ends. Tightening the compression nuts on each side draws the coupling into a firm, leak-free connection.
Both options are compatible with copper, PVC, and CPVC pipe. Compression couplings cost $10 to $30 depending on pipe size and material, and they provide one of the cleanest and most permanent non-replacement repairs available.
Method 5: Plumber's Tape or Pipe Joint Compound for Threaded Joints
Many leaks occur not along the pipe itself but at threaded fitting connections. Resealing a leaking threaded joint is straightforward and costs under $5.
Shut off the water and unscrew the leaking fitting carefully. Removing all traces of old tape or compound from the threads before resealing gives the new material a clean surface to adhere to.
Wrapping the male threads with PTFE plumber's tape in the direction of the thread spiral before reassembly creates a tight seal that prevents water from tracking through the connection. For a stronger result, applying pipe joint compound to the threads before tightening provides an additional layer of sealing protection.
Tighten the fitting by hand first, then give it a quarter turn with a wrench. Overtightening damages the threads and creates a new problem.
Which Method Is Right for Your Leak?
| Method | Best Pipe Type | Leak Type | Difficulty | Cost |
|---|---|---|---|---|
| Repair clamp | All types | Pinholes, small cracks | Easy | $10–$25 |
| Epoxy putty | Copper, PVC, galvanized | Pinholes, joint seeps | Easy | $8–$20 |
| Silicone tape | All types | Hairline cracks | Very easy | $5–$15 |
| Rubber coupling | All types | Joint leaks | Moderate | $10–$30 |
| Plumber's tape | Threaded fittings only | Joint leaks | Easy | Under $5 |
When a Temporary Fix Is Not Enough?
Knowing the limits of a DIY pipe repair is just as important as knowing the methods themselves.
Leaks that return within days of being repaired point to a deeper issue in the pipe that a surface fix cannot address. Pipes that show heavy corrosion, soft spots, or visible deterioration along multiple sections need professional assessment rather than repeated patching.
Any leak located inside a wall, above a ceiling, under flooring, or beneath a concrete slab requires professional leak detection equipment to locate accurately and professional pipe repair to fix safely. Attempting to access those leaks without experience creates far more damage than the original problem.
Multiple leaks appearing in different spots around the home at roughly the same time signal that the pipe system is aging systemically. In those cases, a licensed plumber can evaluate whether targeted repairs or a full repiping solution makes more financial sense for the long term.
Summary
Fixing a leaking pipe without replacing it is completely achievable for most minor leaks, and the right method depends entirely on the type and location of the damage.
A pipe repair clamp handles pinholes and small cracks on exposed pipes quickly and reliably. Epoxy putty bonds directly over damaged areas and sets hard within the hour. Silicone and fiberglass repair tape wraps around the pipe to create a flexible or rigid seal depending on the product. Rubber couplings and compression fittings address joint leaks cleanly without soldering. Plumber's tape and joint compound reseal threaded connections for under $5.
Starting with the right repair material, drying the pipe surface properly, and allowing adequate cure time before restoring water pressure gives every method the best chance of holding long term.
Persistent leaks, corroded pipes, and anything hidden behind walls or under slabs deserve professional attention. Getting expert help early prevents a manageable problem from turning into costly structural water damage.